Move me - Flutter edition
Let us build the MoveMe one more time but with Flutter.
Set up
First thing first, let’s create an empty project with flutter create move_me.
import 'package:flutter/material.dart';

void main() {
  runApp(const MyApp());
}

class MyApp extends StatelessWidget {
  const MyApp({super.key});

  @override
  Widget build(BuildContext context) {
    return MaterialApp(title: 'Move Me', home: MoveMePage());
  }
}

class MoveMePage extends StatefulWidget {
  const MoveMePage({super.key});

  @override
  State<MoveMePage> createState() => _MoveMePageState();
}

class _MoveMePageState extends State<MoveMePage> {
  @override
  Widget build(BuildContext context) {
    return const Placeholder();
  }
}
And give it a run with flutter run.
Layout
Next up, we need 3 blue squares lined up in the center.
So if we have a widget that draws a square
class _Box extends StatelessWidget {
  final Size size;
  final Color color;

  const _Box({required this.size, required this.color});

  @override
  Widget build(BuildContext context) {
    return Container(color: color, width: size.width, height: size.height);
  }
}
And we render three of these squares in a Stack we should be done right?
class _MoveMePageState extends State<MoveMePage> {
  final _origins = [Offset.zero, Offset.zero, Offset.zero];
  final _size = Size(100, 100);

  @override
  Widget build(BuildContext context) {
    return Stack(
      children: [
        for (var idx = 0; idx < _origins.length; idx++)
          Positioned(
            top: _origins[idx].dy,
            left: _origins[idx].dx,
            child: _Box(size: _size, color: Colors.blue),
          ),
      ],
    );
  }
}
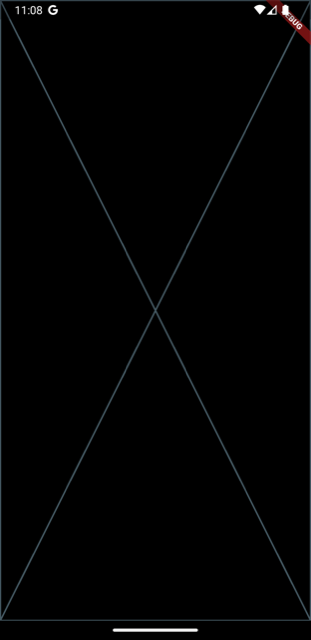
Almost there. This would render all the three square right up at the top left corner. But we need them to be at the center remember? The magic is to let the widget tree render once and then update the origins based on the window size:
class _MoveMePageState extends State<MoveMePage> {
  // ...
  final _origins = [Offset.zero, Offset.zero, Offset.zero];

    @override
  void initState() {
    super.initState();
    WidgetsBinding.instance.addPostFrameCallback((_) {
      final window = WidgetsBinding.instance.platformDispatcher.views.first;
      final size = window.physicalSize / window.devicePixelRatio;
      setState(() {
        for (var idx = 0; idx < _origins.length; idx++) {
          // [0,1,2] (x.25) [0,.25,.5] (+.25) [.25,.50,75]
          var dy = (idx.toDouble() * 0.25) + 0.25;
          _origins[idx] = Offset(
            (size.width - _size.width) * 0.5,
            (size.height - _size.height) * dy,
          );
        }
      });
    });
  }

  // ...
}
And now we should be all set for the adventure
Gestures
Next challenge in our journey is to add gestures. What we need is a way to allow dragging of these beautiful squares around.
One way to achieve this by use the Draggable and its sidekick DragTarget.
So first we need to wrap our square within Draggable, actually 3 squares per square - one for each state normal, selected and shadow. The shadow state is the one that is the original start position, the one where square is going to snap back if something goes wrong. Since we don’t care about that state, we would render it with transparent color.
We also need some sort of identifier to tell each square later to keep track of their positions. And we can use the int name just for that.
class _DraggableBox extends StatelessWidget {
  final Size size;
  final int name;

  _DraggableBox({required this.size, required this.name});

  @override
  Widget build(BuildContext context) {
    return Draggable(
      data: name,
      feedback: _Box(size: size, color: Colors.red), // selected
      childWhenDragging: _Box(size: size, color: Colors.transparent), // shadow
      child: _Box(size: size, color: Colors.blue), // normal
   );
  }
}
With that in place, we need the DragTarget, the parent widget that accepts the drag changes of any of our square. For our case we can simply update the origin of the squares when drag change is detected.
class _MoveMePageState extends State<MoveMePage> {
  // ...
  final _origins = [Offset.zero, Offset.zero, Offset.zero];

  @override
  Widget build(BuildContext context) {
    return Stack(
      children: [
        DragTarget<int>(
          builder: (context, accepted, rejected) => Container(),
          onAcceptWithDetails: (details) {
            setState(() {
              _origins[details.data] = details.offset;
            });
          },
        ),
        for (var idx = 0; idx < _origins.length; idx++)
          Positioned(
            top: _origins[idx].dy,
            left: _origins[idx].dx,
            child: _DraggableBox(size: _size, name: idx),
          ),
      ],
    );
  }

  // ...
}
And with that in place we should have a simple non animated version of MoveMe
Animations
But as they say the last 20 percent takes the 80 percent. Let’s see how much work is it with flutter.
To start with we can update our _Box to handle scale transitions using the TweenAnimationBuilder and the Transform.scale
class _Box extends StatelessWidget {
  final Size size;
  final double scaleBegin;
  final double scaleEnd;
  final Color color;

  const _Box({
    required this.size,
    required this.scaleBegin,
    required this.scaleEnd,
    required this.color,
  });

  @override
  Widget build(BuildContext context) {
    return TweenAnimationBuilder(
      tween: Tween(begin: scaleBegin, end: scaleEnd),
      duration: Durations.medium1,
      curve: Easing.standardAccelerate,
      builder: (context, scale, child) {
        return Transform.scale(
          scale: scale,
          child: Container(
            color: color,
            width: size.width,
            height: size.height,
          ),
        );
      },
    );
  }
}
And then we need to update the _DraggableBox to provide the correct scale start and end values:
class _DraggableBox extends StatelessWidget {
  final Size size;
  final int name;

  _DraggableBox({required this.size, required this.name});

  @override
  Widget build(BuildContext context) {
    return Draggable<int>(
      data: name,
      feedback: _Box(
        size: size,
        scaleBegin: 1.0,
        scaleEnd: 1.2,
        color: Colors.red,
      ),
      childWhenDragging: Container(
        color: Colors.transparent,
        width: size.width,
        height: size.height,
      ),
      child: _Box(
        size: size,
        scaleBegin: 1.2,
        scaleEnd: 1.0,
        color: Colors.blue,
      ),
    );
  }
}
And I guess that is all we need to be able to animate the scale up and down on drag begin and end

Conclusion
Every time I work with flutter, I feel like this is probably the best cross-platform framework out there. All of the documentation is top notch. The API feels very well designed, fits perfectly with the Alan Kay’s principle of designing things: “Simple things should be simple, complex things should be possible”.
I look forward to work more with flutter in the future.
The code from this experiment is at github.com/chunkyguy/MoveMe