Hello NativeScript
So the framework for today is NativeScript. I’ve heard quite a few good things about NativeScript and have often heard various comparisons between NativeScript and ReactNative. So I would like to try it out myself and see where it stands.
And for this task I’m going to build my all time favorite app - PhotoApp
Set up
-
Install nativescript with
npm install -g nativescript - Check Android set up
ns doctor androidNo issues were detected. ✔ Your ANDROID_HOME environment variable is set and points to correct directory. ✔ Your adb from the Android SDK is correctly installed. ✔ The Android SDK is installed. ✔ A compatible Android SDK for compilation is found. ✔ Javac is installed and is configured properly. ✔ The Java Development Kit (JDK) is installed and is configured properly. ✔ Getting NativeScript components versions information... ✔ Component nativescript has 8.9.3 version and is up to date. - Check iOS set up
ns doctor iosNo issues were detected. ✔ Xcode is installed and is configured properly. ✔ xcodeproj is installed and is configured properly. ✔ CocoaPods are installed. ✔ CocoaPods update is not required. ✔ CocoaPods are configured properly. ✔ Your current CocoaPods version is newer than 1.0.0. ✔ Python installed and configured correctly. ✔ Xcode version 16.3.0 satisfies minimum required version 10. ✔ Getting NativeScript components versions information... ✔ Component nativescript has 8.9.3 version and is up to date. - Create a new app
ns create photo-app --js. ├── app ├── App_Resources ├── hooks ├── jsconfig.json ├── nativescript.config.ts ├── node_modules ├── package-lock.json ├── package.json ├── README.md └── webpack.config.js - Run
ns run ios
UI
Native script works with a 2 way binding between the UI described in xml files and the corresponding view model written in javascript.
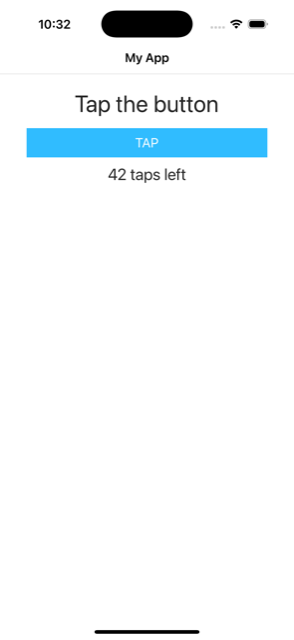
The minimal example would be to create a sample-page.xml and a corresponding sample-page.js:
<Page xmlns="http://schemas.nativescript.org/tns.xsd" navigatingTo="navigatingTo">
    <ActionBar title="Sample" />
    <StackLayout class="p-20">
        <Label text="" class="h2 text-center" textWrap="true" />
        <Button text="Tap here" tap="" class="-primary" />
    </StackLayout>
</Page>
import { Observable } from "@nativescript/core";

function createViewModel() {
  const viewModel = new Observable();
  viewModel.message = "Hello world!"
  return viewModel;
}

export function navigatingTo(args) {
  const page = args.object;
  page.bindingContext = createViewModel();
}
In this example the UI invokes the navigatingTo() whenever the page is rendered for the first time where can create our view model as an Observable type and pass it back to the UI as bindingContext.
Based on this information, if we mock a PhotoService as:
photos = [
    {
      id: "37",
      author: "Austin Neill",
      width: 2000,
      height: 1333,
      url: "https://unsplash.com/photos/erTjj730fMk",
      download_url: "https://picsum.photos/id/37/2000/1333",
    },
    /* ... */
];

export function getPhotos() {
  return photos;
}

export function getPhotoById(id) {
  return photos.find((it) => it.id === id) || undefined;
}
Then we can create our home-page as:
<Page xmlns="http://schemas.nativescript.org/tns.xsd" navigatingTo="navigatingTo">
  <ActionBar title="Photos" />
  <StackLayout height="100%">
    <ListView
      height="100%"
      separatorColor="transparent"
      items=""
      itemTap=""
      margin="10"
    >
      <ListView.itemTemplate>
        <GridLayout
          height="280"
          borderRadius="10"
          class="bg-secondary"
          rows="*, auto, auto"
          columns="*"
          margin="5 10"
          padding="0"
        >
          <Image
            row="0"
            margin="0"
            stretch="aspectFill"
            src=""
            backgroundColor="grey"
          />
          <Label
            row="1"
            margin="10 10 0 10"
            fontWeight="400"
            class="text-primary"
            fontSize="18"
            text=""
          />
        </GridLayout>
      </ListView.itemTemplate>
    </ListView>
  </StackLayout>
</Page>
import { Frame, Observable, ObservableArray } from "@nativescript/core";
import * as PhotoService from "../services/photos.service";

function createViewModel() {
  const viewModel = new Observable();
  viewModel.photos = PhotosService.getPhotos();
  viewModel.onPhotoTap = (args) => { /* TODO */ };
  return viewModel;
}

export function navigatingTo(args) {
  if (args.isBackNavigation) {
    return;
  }

  const page = args.object;
  page.bindingContext = createViewModel();
}

And our details page as:
<Page xmlns="http://schemas.nativescript.org/tns.xsd" navigatingTo="navigatingTo">
    <ActionBar title="" />
     <StackLayout class="p-20">
        <Image src="" />
        <Label text="" class="caption text-center" textWrap="true" />
    </StackLayout>
</Page>
import { Observable } from "@nativescript/core";
import * as PhotoService from "../services/photos.service";

function createViewModel() {
  const viewModel = new Observable();
  viewModel.photo = PhotosService.getPhotoById("42");
  return viewModel;
}

export function navigatingTo(args) {
  const page = args.object;
  page.bindingContext = createViewModel();
}

Navigation
To navigate from home to details page we need update our home-page.js to:
  viewModel.onPhotoTap = (args) => {
    Frame.topmost().navigate({
      moduleName: "details/details-page",
      context: { photoId: viewModel.photos[args.index].id },
    });
  };
And then the details-page.js to parse the photoId
function createViewModel(args) {
  const viewModel = new Observable();
  viewModel.photo = PhotoService.getPhotoById(args.photoId);

  viewModel.onRefresh = () => {
    viewModel.set("photo", PhotoService.getPhotoById(args.photoId));
  };

  return viewModel;
}

export function onNavigatingTo(args) {
  const page = args.object;
  page.bindingContext = createViewModel(page.navigationContext);
}
Networking
The final piece in the puzzle is fetching the data from the internet. That means updating our PhotoService to async
async function getData(url) {
  try {
    const response = await fetch(url);
    if (!response.ok) {
      throw new Error(`Response status: ${response.status}`);
    }
    return await response.json();
  } catch (error) {
    console.error(error.message);
    return null;
  }
}

export async function getPhotos() {
  return await getData("https://picsum.photos/v2/list?page=2");
}

export async function getPhotoById(id) {
  return await getData(`https://picsum.photos/id/${id}/info`);
}
And then bubbling up the async calls to the view models layer
export async function onNavigatingTo(args) {
  // ...
  const page = args.object;
  page.bindingContext = await createViewModel();
}

async function createViewModel() {
  const viewModel = new Observable();
  viewModel.photos = await PhotoService.getPhotos();
  // ...
  return viewModel;
}
Since the data is now coming via a network call. So we need to add a loading state to the app. This means two things. First we need to update our home page to have a loading indicator.
<Page xmlns="http://schemas.nativescript.org/tns.xsd">
  <ActionBar title="Photos" />
  <GridLayout height="100%" rows="*" columns="*">
    <ActivityIndicator
      busy="true"
      visibility=""
      row="0"
    />
    <StackLayout height="100%" row="0">
      <!-- ... -->
    </StackLayout>

  </GridLayout>
</Page>
And second, we need to update our view model to handle both navigatingTo and navigatedTo
<Page
  xmlns="http://schemas.nativescript.org/tns.xsd"
  navigatingTo="onNavigatingTo"
  navigatedTo="onNavigatedTo"
>
  <!--  -->
</Page>
export function onNavigatingTo(args) {
  if (args.isBackNavigation) {
    return;
  }
  const page = args.object;
  page.bindingContext = {
    loadingVisibility: "visible",
    photos: [],
    onPhotoTap: null,
  };
}

export async function onNavigatedTo(args) {
  const page = args.object;
  page.bindingContext = await createViewModel();
}

async function createViewModel() {
  const viewModel = new Observable();
  viewModel.loadingVisibility = "hidden";
  viewModel.photos = await PhotoService.getPhotos();
  // ...
  return viewModel;
}

Two column grid
And next lets make the UI a 2 column grid. Surprisingly, the official API does not provide anything out of the box and the recommended way is to use a community plugin ui-collectionview-alignedflowlayout. So that means we need update our package.json to:
"dependencies": {
    "@nativescript-community/ui-collectionview-alignedflowlayout": "^6.0.4",
}
And then to configure the plugin we need to update the app.js
import install from "@nativescript-community/ui-collectionview-alignedflowlayout";
install();
And then we can finally update the UI in home-page.xml to:
<gv:CollectionView row="0" items="" colWidth="50%" rowHeight="150">
    <gv:CollectionView.itemTemplate>
      <Image
        row="0"
        margin="8"
        stretch="aspectFill"
        src=""
        backgroundColor="grey"
      />
  </gv:CollectionView.itemTemplate>
</gv:CollectionView>

Conclusion
NativeScript looks really mature. I like the clear separation between xml and js. And I certainly belive some great apps can be built using it and I would love to play more with this tech.