Data-Driven UI with UIKit
Preserving the theme of simplicity let’s make use of one of my favorite method from UIKit - layoutSubviews and build a data driven UI system.
Every UI framework comes with three things:
- A tree with several nodes.
- A renderer that visits every node in that tree and calls
draw()on them. - An infinite loop that keeps the renderer visiting the root node of the tree in a loop, preferably 60 times per second.
Although I haven’t seen the source code but I assume UIKit is probably no different. Now, eventually calling draw() becomes redundant if nothing has actually changed in that node since the last visit. So I imagine a sort of flag isDirty: Bool is kept per node which is then set whenever a node is required to be drawn.
If my assumptions are true than deep within UIKit there’s a draw() method that looks something like:
class Node {
  var isDirty = false

  func draw() {
    guard isDirty else { return }
    layoutSubviews()
    // do more stuff ...
    isDirty = false
  }

  func setNeedsLayout() {
    // will draw at next screen refresh
    isDirty = true
  }

  func layoutIfNeeded() {
    isDirty = true
    draw()
  }

  func layoutSubviews() {
    // to be subclassed
  }
}
This means that with proper use of setNeedsLayout, layoutIfNeeded and layoutSubviews we can come up with a decent data driven layout system. With that in mind let’s try to rebuild the classic MoveMe example.
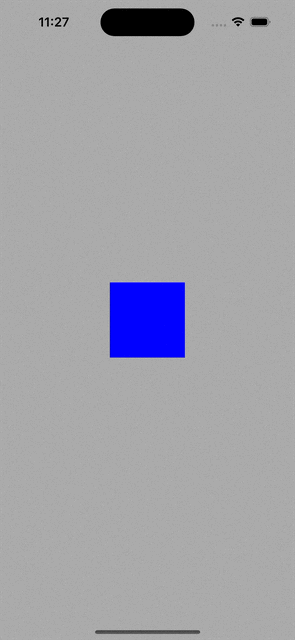
MoveMe
If you’re not familiar with the exercise, MoveMe example is like the “hello world!” for UI frameworks. It requires placing a small card view with some default values. At finger down the color of the card changes and the card scales up a bit with animation. Then the card can be dragged around while the finger is still down. Some time later when the finger is lifted the color and the size of the card resets.
Layout System
The system we want to build is similar to the trend of these days, a data driven UI, where we only need to take care of updating the data and the view would automatically update. Our layout system is based on the idea that UIKit calls layoutSubviews whenever the UIView is marked as dirty. So if we have a struct model data in our UIView subclass, then we can use the didSet property observer to invoke setNeedsLayout whenever the model data changes. Then it would mean that at the next draw cycle our layoutSubviews would get invoked. So we can safely keep all of our UI updates in layoutSubviews
struct Colors {
  static var normal = UIColor.blue
  static var selected = UIColor.red
}

class MoveMeView: UIView {
    struct Model {
    var color = Colors.normal
    var scale: CGFloat
    var position = CGPoint.zero
  }

  private let cardView = UIView(frame: CGRect(origin: .zero,
                                              size: CGSize(width: 100, height: 100)))

  private var model: Model! {
    didSet { setNeedsLayout() }
  }

  override func layoutSubviews() {
    super.layoutSubviews()
    if model == nil {
      model = Model(color: .blue, scale: 1.0, position: center)
    }

    cardView.backgroundColor = model.color
    cardView.center = model.position
    cardView.transform = CGAffineTransform(scaleX: model.scale, y: model.scale)
  }
}
Notice that we are initializing the model when the first time layoutSubviews is invoked, this is because the UIKit also calls layoutSubviews as part of building the internal render tree. And values like center of a UIView are not known at init time when using auto layout so we can build our initial data the first time layoutSubviews is invoked.
With that in place, any update to our model data would now trigger layoutSubviews at next draw cycle.
model.color = Colors.normal
model.scale = 1.2
So there we have our UI = f(data) pipeline. This would also work nicely for things where we get a continuous stream of events, like say a callback handler of a drag gesture
extension CGPoint {
  static func add(_ left: CGPoint, _ right: CGPoint) -> CGPoint {
    return CGPoint(x: left.x + right.x, y: left.y + right.y)
  }
}

let translation = panGestureRecognizer.translation(in: self)
model.position = CGPoint.add(translation, model.position)
panGestureRecognizer.setTranslation(.zero, in: self)
Animation is a bit tricky but if we update properties that are animatable within the UIView.animate block it should work, like the transform property in our case
model.scale = 1.2
UIView.animate(withDuration: 0.3) {
  self.layoutIfNeeded()
}
Another way to think about it is that UIKit provides a way to perform implicit animation for a lot of properties, we just need to provide a final value for them and UIKit does the rest.
This code above is equivalent to
let scale = 1.2
UIView.animate(withDuration: 0.3) {
  self.cardView.transform = CGAffineTransform(scaleX: scale, y: scale)
}
With that we can finish off by adding a UIPanGestureRecognizer to make the cardView move with user interaction complete with animations.
class MoveMeView: UIView {
  // ...

  override init(frame: CGRect) {
    super.init(frame: frame)
    addSubview(cardView)

    let dragGesture = UIPanGestureRecognizer(target: self, action: #selector(onDrag))
    addGestureRecognizer(dragGesture)
  }

  @objc func onDrag(_ panGestureRecognizer: UIPanGestureRecognizer) {
    switch panGestureRecognizer.state {
    case .began:
      model.color = Colors.normal
      model.scale = 1.2
      UIView.animate(withDuration: 0.3, delay: 0, options: [.beginFromCurrentState]) {
        self.layoutIfNeeded()
      }

    case .changed:
      model.color = Colors.selected
      let translation = panGestureRecognizer.translation(in: self)
      model.position = CGPoint.add(translation, model.position)
      panGestureRecognizer.setTranslation(.zero, in: self)

    case .ended:
      model.color = Colors.normal
      model.scale = 1.0
      UIView.animate(withDuration: 0.3, delay: 0, options: [.beginFromCurrentState]) {
        self.layoutIfNeeded()
      }

    default:
      model.color = Colors.normal
      model.scale = 1.0
    }
  }
}