Hello MAUI
So another cross platform tool that I’ve been trying to poke for a very very long time now is .NET MAUI. Since I love making games with Unity and C# so I’ve always wondered what would it feel like to also make apps with C#. Also I’ve heard good things about .NET. So yes, lets dive into it.

Set up
The first struggle getting started with MAUI is that according to the official docs the first step is to Download and install Visual Studio 2022 for Mac but also recently they announced that Visual Studio for Mac is going away soon. The recommended route for the upcoming future is to use the Visual Studio Code with the official extensions, so this is what I’m also going to try.
So let’s install:
- vscode extensions
- dotnet
dotnet workload install maui
Next up, create the project using whatever they tell you to. And then after spending a weekend updating and installing the ‘correct’ version of macOS, Xcode, Simulator runtimes and whatnot we finally have our MAUI project building and running!
Maybe using Android as the base development target would had been easier, but who know
Let’s make the app
So the next struggle is to find good resources on learning .NET MAUI. There are very limited resources out there. From the official docs I was able to find a good tutorial on getting started with MAUI. The workshop is about building an app called Monkey Finder. Sounds great!
So again looking at our json data from jsonplaceholder/photos
[
  {
    "albumId": 1,
    "id": 1,
    "title": "accusamus beatae ad facilis cum similique qui sunt",
    "url": "https://via.placeholder.com/600/92c952",
    "thumbnailUrl": "https://via.placeholder.com/150/92c952"
  },
]
the first thing we need is a model object, conveniently called Photo
public class Photo
{
    public int albumId { get; set; }
    public int id { get; set; }
    public string title { get; set; }
    public string url { get; set; }
    public string thumbnailUrl { get; set; }
}
Next, we want to render this object in an element. With MAUI or .NET development in general it seems to be the standard practice to group classes under an various namespace grouping similar functionalities, like Models and Views. So the Photo type above would be under namespace PhotoApp.Models and all the views would be under namespace PhotoApp.Views.
Then in the xaml files the namespaces can be imported as:
xmlns:views="clr-namespace:PhotoApp.Views"
Another pattern is to use a local namespace for the entire App code and no more worrying about namespaces anymore.
xmlns:local="clr-namespace:PhotoApp"
To be honest I can’t make up my mind. I’ll try them both out and see whatever feels good.
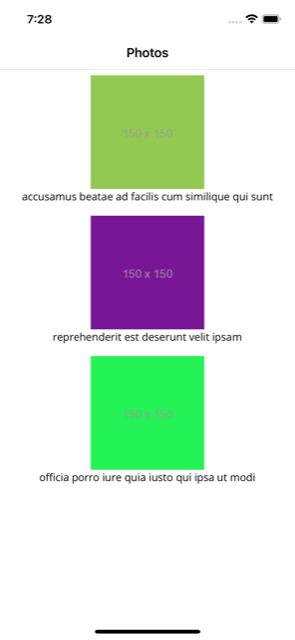
The UI API is like any other old school xml based api. So for a list of items with each item having a image and text elements vertically laid out we can use a CollectionView
<?xml version="1.0" encoding="utf-8" ?>
<ContentPage xmlns="http://schemas.microsoft.com/dotnet/2021/maui"
             xmlns:x="http://schemas.microsoft.com/winfx/2009/xaml"
             xmlns:models="clr-namespace:PhotoApp.Models"
             x:Class="PhotoApp.Views.MainPage">
    <CollectionView>
        <CollectionView.ItemsSource>
            <x:Array Type="{x:Type models:Photo}">
                <models:Photo
                    albumId="1"
                    id="1"
                    title="accusamus beatae ad facilis cum similique qui sunt"
                    url="https://via.placeholder.com/600/92c952"
                    thumbnailUrl="https://via.placeholder.com/150/92c952" />
                <models:Photo
                    albumId="1"
                    id="2"
                    title="reprehenderit est deserunt velit ipsam"
                    url="https://via.placeholder.com/600/771796"
                    thumbnailUrl="https://via.placeholder.com/150/771796" />
                <models:Photo
                    albumId="1"
                    id="3"
                    title="officia porro iure quia iusto qui ipsa ut modi"
                    url="https://via.placeholder.com/600/24f355"
                    thumbnailUrl="https://via.placeholder.com/150/24f355"/>
            </x:Array>
        </CollectionView.ItemsSource>
        <CollectionView.ItemTemplate>
            <DataTemplate x:DataType="models:Photo">
                <VerticalStackLayout Padding="8">
                    <Image Source="{Binding thumbnailUrl}" />
                    <Label
                        Text="{Binding title}"
                        HorizontalOptions = "LayoutOptions.CenterAndExpand" />
                </VerticalStackLayout>
            </DataTemplate>
        </CollectionView.ItemTemplate>
    </CollectionView>
</ContentPage>
The interesting bit is that while prototyping we can hardcode that data right within xaml using CollectionView.ItemsSource.
Each element within the collection view needs a ItemTemplate and then within the ItemTemplate we can define the sort of function per data type with DataTemplate with the argument being passed in as Binding.
Mentally I think of this in code as:
CollectionView(
    itemsSource = Photo[] { ... },
    itemTemplate = {
        dataTemplate = (binding: Photo) => View { ... }
    }
)
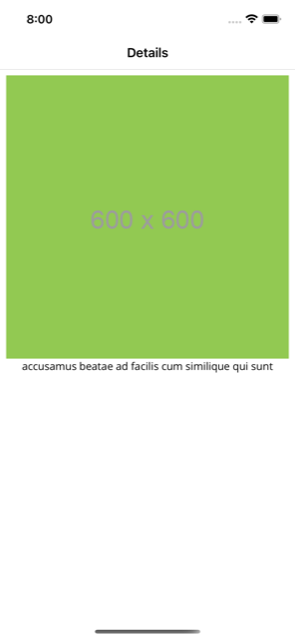
And similarly for the details page we can do something like:
<?xml version="1.0" encoding="utf-8" ?>
<ContentPage xmlns="http://schemas.microsoft.com/dotnet/2021/maui"
             xmlns:x="http://schemas.microsoft.com/winfx/2009/xaml"
            xmlns:models="clr-namespace:PhotoApp.Models"
             x:Class="PhotoApp.Views.DetailsPage">
    <CollectionView>
        <CollectionView.ItemsSource>
            <x:Array Type="{x:Type models:Photo}">
                <models:Photo
                    albumId="1"
                    id="1"
                    title="accusamus beatae ad facilis cum similique qui sunt"
                    url="https://via.placeholder.com/600/92c952"
                    thumbnailUrl="https://via.placeholder.com/150/92c952" />
            </x:Array>
        </CollectionView.ItemsSource>
        <CollectionView.ItemTemplate>
            <DataTemplate x:DataType="models:Photo">
                <VerticalStackLayout Padding="8">
                    <Image Source="{Binding url}" />
                    <Label
                        Text="{Binding title}"
                        HorizontalOptions = "LayoutOptions.CenterAndExpand" />
                </VerticalStackLayout>
            </DataTemplate>
        </CollectionView.ItemTemplate>
    </CollectionView>
</ContentPage>
One of the cool things that I like about xaml is that we can use the shorthand or the long version of a tag. So these two are identical:
<Label FontSize="22" />

<Label>
    <Label.FontSize>
        22
    </Label.FontSize>
</Label>
Navigation
So how about adding a transition between the screens. To achieve this there are quite a number of steps.
First we need to register a route. This is pretty simple in MAUI. There’s actually a pretty nice convenience way to avoid hardcoding "DetailsPage" by using the nameof expression.
public partial class AppShell : Shell
{
    public AppShell()
    {
        InitializeComponent();
        Routing.RegisterRoute(nameof(DetailsPage), typeof(DetailsPage));
    }
}
Next sticking with the MVC pattern we need to create a MainController class for our MainPage. The controller only has a single command which is to invoke the "DetailsPage" route
public partial class MainController : ObservableObject
{
    [RelayCommand]
    async Task Tap()
    {
        await Shell.Current.GoToAsync(nameof(DetailsPage));
    }
}
And next we need to inject the MainController as an dependency to the MainPage.
public partial class MainPage : ContentPage
{
    public MainPage(MainController controller)
    {
        InitializeComponent();
        BindingContext = controller;
    }
}
We need to set the BindingContext to the controller to have this available in the associated xaml file. And that is where we can add a TapGestureRecognizer to the Image
<?xml version="1.0" encoding="utf-8" ?>
<ContentPage xmlns="http://schemas.microsoft.com/dotnet/2021/maui"
             xmlns:x="http://schemas.microsoft.com/winfx/2009/xaml"
             xmlns:models="clr-namespace:PhotoApp.Models"
             xmlns:ctrls="clr-namespace:PhotoApp.Controllers"
             x:Class="PhotoApp.Views.MainPage"
             x:DataType="PhotoApp.Controllers.MainController">
    <CollectionView>
        <CollectionView.ItemsSource> ... </CollectionView.ItemsSource>
        <CollectionView.ItemTemplate>
            <DataTemplate x:DataType="models:Photo">
                <VerticalStackLayout Padding="8">
                    <Image Source="{Binding thumbnailUrl}">
                        <Image.GestureRecognizers>
                        <TapGestureRecognizer
                            Command="{Binding Source={RelativeSource AncestorType={x:Type ctrls:MainController}}, Path=TapCommand}" />
                        </Image.GestureRecognizers>
                    </Image>
                    <Label
                        Text="{Binding title}"
                        HorizontalOptions = "LayoutOptions.CenterAndExpand" />
                </VerticalStackLayout>
            </DataTemplate>
        </CollectionView.ItemTemplate>
    </CollectionView>
</ContentPage>
The final missing piece is to make sure that the MainController is injected into our MainPage when constructed. This can be done in the MauiProgram
public static class MauiProgram
{
    public static MauiApp CreateMauiApp()
    {
        var builder = MauiApp.CreateBuilder();
        // ...
        builder.Services.AddSingleton<MainPage>();
        builder.Services.AddSingleton<MainController>();
        // ...
        return builder.Build();
    }
}
This pattern prepares the builder factory to provide instances as a singleton or as transient whenever requested.
And with this in place we can finally go from MainPage to DetailsPage
To pop back we need to create and bind a DetailsController with DetailsPage and navigate back to parent with ..
public partial class DetailsController : ObservableObject
{
    [RelayCommand]
    async Task GoBack()
    {
        await Shell.Current.GoToAsync("..", true);
    }
}
// MainProgram.cs
builder.Services.AddTransient<DetailsPage>();
builder.Services.AddTransient<DetailsController>();
<!-- DetailsPage.xaml -->
<Shell.BackButtonBehavior>
    <BackButtonBehavior Command="{Binding GoBackCommand}" TextOverride="Back" />
</Shell.BackButtonBehavior>
For some reason I’m unable to have the “Back” text on the navbar. But anyways when I tap on the empty space where the back button should’ve been otherwise I’m able to pop back. Is this a bug or feature it’s too early for me to say.
Fetching data
Next up is fetching data from the network. One easy way to get started is to have pull to refresh. This can be achieved by adding RefreshView to the MainPage
<RefreshView
    IsRefreshing="{Binding IsRefreshing}"
    Command="{Binding GetPhotosCommand}">
    <CollectionView
        ItemsSource="{Binding Photos}"
        SelectionMode="None" >
        <CollectionView.ItemTemplate>
            <DataTemplate x:DataType="local:Photo">
                <VerticalStackLayout Padding="8">
                    <Image Source="{Binding thumbnailUrl}" />
                    <Label
                        Text="{Binding title}"
                        HorizontalOptions = "LayoutOptions.CenterAndExpand" />
                </VerticalStackLayout>
            </DataTemplate>
        </CollectionView.ItemTemplate>
    </CollectionView>
</RefreshView>
Notice that we are now loading the data from a Photos collection from the context, and similarly we are sending the GetPhotosCommand to the context whenever the pull-to-refresh is triggered.
Next step is to actually implement the GetPhotosCommand in BindingContext aka the MainController
public partial class MainController : ObservableObject
{
    public ObservableCollection<Photo> Photos { get; } = new();
    PhotoService photoService;

    [ObservableProperty]
    bool isRefreshing;

    [ObservableProperty]
    string title;

    public MainController(PhotoService photoService)
    {
        this.photoService = photoService;
        Title = "Photos";
    }

    [RelayCommand]
    async Task GetPhotos()
    {
        try
        {
            var photos = await photoService.GetPhotos();
            Photos.Clear();
            // The default photos is a list of 5000 elements .. so we only load first 100
            for (int i = 0; i < photos.Count && i < 100; i++)
                Photos.Add(photos[i]);
        }
        catch (System.Exception ex)
        {
            // TODO: show error UI

        }
        finally
        {
            IsRefreshing = false;
        }
    }
}
Due to the .NET magic, GetPhotosCommand is mapped to GetPhotos method because it is annotated with RelayCommand. And thanks to the magic of ObservableCollection the UI will refresh automatically whenever the collection is updated. But this could have some performance implication, so I tried to only load a few photos.
The final missing piece is the PhotoService, which is also probably the least surprising, just some good old data fetching and json parsing.
public class PhotoService
{
    HttpClient httpClient;

    public PhotoService()
    {
        httpClient = new HttpClient();
    }

    public async Task<List<Photo>> GetPhotos()
    {
        var response = await httpClient.GetAsync("https://jsonplaceholder.typicode.com/photos");
        if (response.IsSuccessStatusCode)
        {
            return await response.Content.ReadFromJsonAsync(PhotoContext.Default.ListPhoto);
        }
        return new List<Photo>();
    }
}
PhotoContext is how cool kids provide a List<Photo> type
[JsonSerializable(typeof(List<Photo>))]
internal sealed partial class PhotoContext : JsonSerializerContext {}
And so we finally can get the data from network
Passing data between screens
And with that the last remaining item on the list is to pass the data between pages. So to keep things simple if we were to have the DetailsPage also make use of CollectionView but rather have an array of one element as data source, our DetailsController would look almost identical to MainController except that we also need to implement the IQueryAttributable to support receiving of data that we would send from the MainPage.
In our case we would be passing a Dictionary with single element in it as Photo
public partial class DetailsController : ObservableObject, IQueryAttributable
{
    public ObservableCollection<Photo> Photos { get; } = new();

    [ObservableProperty]
    string title;

    public DetailsController()
    {
        Title = "Details";
    }

    public void ApplyQueryAttributes(IDictionary<string, object> query)
    {
        var photo = query["Photo"] as Photo;
        Photos.Add(photo);
    }

    //...
}
Next in the MainController we need to update the TapCommand to take in a Photo as parameter that can be forwarded to the DetailsPage.
public partial class MainController : ObservableObject
{
    [RelayCommand]
    async Task Tap(Photo photo)
    {
        var navigationParameter = new Dictionary<string, object> { { "Photo", photo } };
        await Shell.Current.GoToAsync(nameof(DetailsPage), navigationParameter);
    }

    // ...
}
And finally, from the MainPage UI we need to fill in the Photo as CommandParameter
<DataTemplate x:DataType="local:Photo">
    <VerticalStackLayout>
        <Image Source="{Binding thumbnailUrl}">
            <Image.GestureRecognizers>
            <TapGestureRecognizer
Command="{Binding Source={RelativeSource AncestorType={x:Type local:MainController}}, Path=TapCommand}"
CommandParameter="{Binding .}" />
            </Image.GestureRecognizers>
        </Image>
    </VerticalStackLayout>
</DataTemplate>
Conclusion
This brings me to the end of this experiment for now. So how do I feel about MAUI? I think I’m sort of relieved that this experiment is done for now. I feel that MAUI needs a lot of work before it can actually be used for real. There are way too many bugs currently. And on macOS, which I guess is the main machine for most of the mobile devs, working on MAUI with Visual Studio Code was very painful. But I hope it would improve.
Said that, I do like the idea of having a nice language like C# for making apps. MAUI has all the potential to be the best cross-platform mobile development tool out there. Also building on top of .NET and other battle tested Microsoft tech sounds very promising and I was able to find a lot of help online for any question I had. So I would definitely be keeping an eye out for MAUI.
Next I would probably try MAUI from a Windows machine with Visual Studio, you know the way it’s supposed to be, and see if that actually improves the developer experience.
The code is available at github.com/chunkyguy/PhotoApp like always.