FLIC - The holy grail of all GUI architectures
After many years of search for the best way to build GUI softwares I think I’ve finally found the one true architecture to rule them all!
It is known by many names, some call it the Elm Architecture others call it Redux or Flux, but for simplicity I’ll just call it Feedback Loop Is Cool or FLIC.
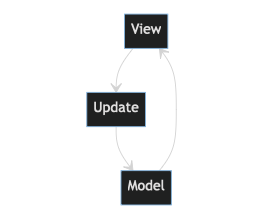
At the core of FLIC is a 3 piece orchestra:
- The Model that holds the state.
- The View that draws the state.
- And the Update that triggers the state change.
Another way to look at this architecture is in terms of scene graph. So any GUI application has a tree of Node where each node represents one piece of drawable on screen.
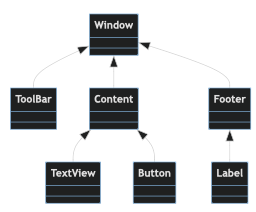
Some of these are simple drawable nodes, you give them some data to draw and they draw it, no questions asked. Like say the Label which takes in a String and draws it. While others are interactive nodes that can emit an event but don’t care who handles that event, like the Button. And finally there are some reactive parent nodes that listen to events emitted from their subtree. These nodes might also hold the state of the subtree and based on the event received they then update the state and trigger a redraw of the subtree below them or just let the event bubble up the tree to be handled by some other parent node. For example, in our case the Button might emit an event that is then caught by the Content and which then might pass a new piece of data to TextView to draw.
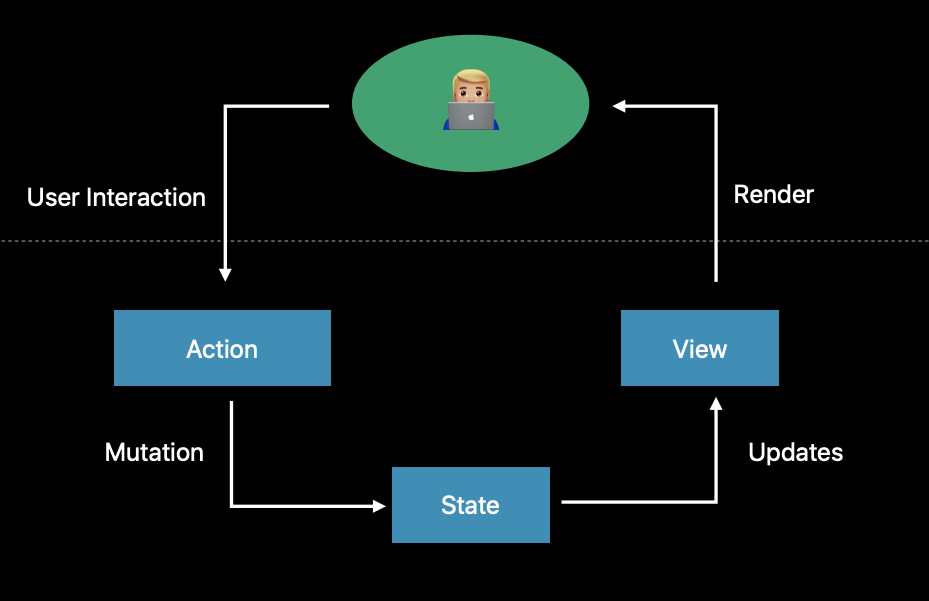
In other words FLIC says:
“data goes down and event goes up”.
And that’s it! This is all there is to learn about the architecture. The beauty of this simple pattern is that it is easy to wrap your head around, faster to develop because you’re focusing on only one thing at a time, could be just the drawing part or event handling and so is also easier to maintain. Also since this is such a simple pattern it can be easily applied to any other framework.
UIKit Implementation
On iOS currently we have two UI frameworks, UIKit and SwiftUI and both have a very different opinion on how UI layer should function. SwiftUI is already very close to FLIC and Apple has published quite a lot of articles and videos on how to manage Data and State.
Building FLIC on top of SwiftUI should be easy peasy, so let’s keep it for some other day. Today let’s tackle UIKit. Let’s try building an app and see it in action. Obviously we would be building the hello world of mobile apps, which is the Photo App where we have a loading screen, a success screen with a list of photos and an error screen. Also when we tap on a photo we get a details screen.
Infrastructure
First we need some classes and protocols for sending and catching events
/// Any event
public protocol ViewEvent {}

/// Any event handler
public protocol ViewEventHandler: AnyObject {
  func handle(event: ViewEvent, sender: UIView?)
}

/// Any view that can emit event via the event handler
open class EventView: UIView {
  public weak var eventHandler: ViewEventHandler? {
    didSet {
      subviews.forEach {
        ($0 as? EventView)?.eventHandler = eventHandler
      }
    }
  }

  public init(eventHandler: ViewEventHandler? = nil, frame: CGRect) {
    self.eventHandler = eventHandler
    super.init(frame: frame)
  }

  public required init?(coder: NSCoder) {
    fatalError("init(coder:) has not been implemented")
  }

  open override func didAddSubview(_ subview: UIView) {
    super.didAddSubview(subview)
    (subview as? EventView)?.eventHandler = eventHandler
  }
}
Next we need is a simple wrapper around UIView so that we won’t have to repeat the same code every time we create a new class.
/// Any view with a view model and an optional event handler
open class View<ViewModel>: EventView {
  public var viewModel: ViewModel {
    didSet {
      if isSetUp {
        viewModelDidUpdate()
      }
    }
  }

  public private(set) var isSetUp: Bool

  public init(viewModel: ViewModel, eventHandler: ViewEventHandler?, frame: CGRect? = nil) {
    self.viewModel = viewModel
    self.isSetUp = frame != nil
    super.init(eventHandler: eventHandler, frame: frame ?? .zero)
    if isSetUp {
      setUp()
    }
  }

  public convenience init(_ viewModel: ViewModel) {
    self.init(viewModel: viewModel, eventHandler: nil)
  }

  public required init?(coder: NSCoder) {
    fatalError("init(coder:) has not been implemented")
  }

  open override func layoutSubviews() {
    super.layoutSubviews()
    setUpIfNeeded()
  }

  private func setUpIfNeeded() {
    if !isSetUp {
      isSetUp = true
      setUp()
      viewModelDidUpdate()
    }
  }

  // Methods that subclass needs to override
  open func setUp() {}
  open func viewModelDidUpdate() {}
}
And last is an completely optional but handy wrapper to provide an interface to swap any arbitrary content with containerVw.view = SomeContentView(). Note I’m using VFL because it’s was lying around when I was typing this out.
private let contentViewBindableTag = Int.max

/// Any view type that if provides a contentView get a view that fills the content
public protocol ContentViewBindable: AnyObject {
  var contentView: UIView { get }
}

extension ContentViewBindable {
  /// When set replaces the content
  public var view: UIView? {
    get { contentView.viewWithTag(contentViewBindableTag) }
    set {
      if let oldView = contentView.viewWithTag(contentViewBindableTag) {
        oldView.removeFromSuperview()
      }

      if let newView = newValue {
        VFL(contentView)
          .add(subview: newView, name: "view")
          .applyConstraints(formats: ["H:|[view]|", "V:|[view]|"])
        newView.tag = contentViewBindableTag
      }
    }
  }
}
And a bunch of classes that implement ContentViewBindable
open class ContainerView: UIView, ContentViewBindable {
  public var contentView: UIView { self }
}
open class TableViewCell: UITableViewCell, ContentViewBindable {}
open class TableViewHeaderFooterView: UITableViewHeaderFooterView, ContentViewBindable {}
open class CollectionCell: UICollectionViewCell, ContentViewBindable {}
open class CollectionReusableView: UICollectionReusableView, ContentViewBindable {
  public var contentView: UIView { self }
}
And we are done with the infrastructure.
Views
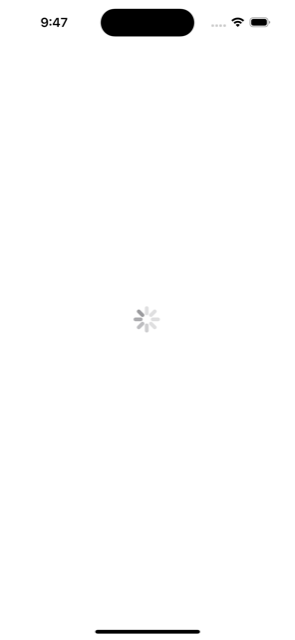
We definitely need an AsyncView to wrap the 3 states: loading, error and success
enum AsyncViewModel {
  case loading
  case success(UIView)
  case error(AppError)
}

class AsyncView: View<AsyncViewModel>, ContentViewBindable {
  var contentView: UIView { self }

  override func setUp() {
    super.setUp()
    backgroundColor = .white
  }

  override func viewModelDidUpdate() {
    super.viewModelDidUpdate()
    switch viewModel {
    case .loading:
      self.view = LoadingView(true)
    case .success(let view):
      self.view = view
    case .error(let error):
      self.view = ErrorView(error)
    }
  }
}
LoadingView is simple because the ViewModel is a Bool
class LoadingView: View<Bool> {
  private let loadingVw = UIActivityIndicatorView(style: .large)

  override func setUp() {
    super.setUp()
    VFL(self)
      .add(subview: loadingVw, name: "loadingVw")
      .applyConstraints(constraints: [
        loadingVw.centerXAnchor.constraint(equalTo: centerXAnchor),
        loadingVw.centerYAnchor.constraint(equalTo: centerYAnchor)
      ])
    loadingVw.hidesWhenStopped = true
    loadingVw.tintColor = UIColor.black
  }

  override func viewModelDidUpdate() {
    super.viewModelDidUpdate()
    if viewModel {
      loadingVw.startAnimating()
    } else {
      loadingVw.stopAnimating()
    }
  }
}
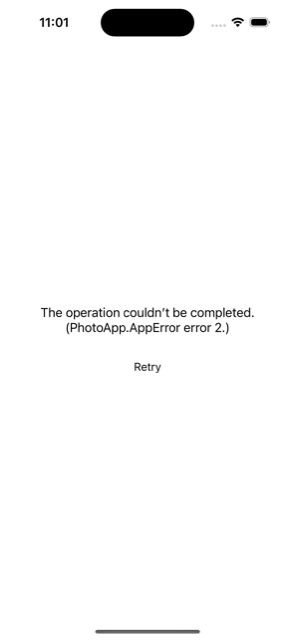
The ErrorView on the other hand is interesting because apart from rendering the error message it also needs to emit event in case user taps on the retry button.
enum AppError: Error {
      // ...
}

enum AppViewEvent: ViewEvent {
  case retry
  // ...
}

class ErrorView: View<AppError> {
  override func setUp() {
    let label = UILabel()
    let button = UIButton(type: .roundedRect)
    super.setUp()
    VFL(self)
      .add(subview: label, name: "label")
      .add(subview: button, name: "button")
      .applyConstraints(formats: [
        "H:|[label]|",
        "H:[button(100)]",
        "V:[label]-16-[button(52)]"
      ])
      .appendConstraints([
        label.centerYAnchor.constraint(equalTo: centerYAnchor),
        button.centerXAnchor.constraint(equalTo: centerXAnchor)
      ])
    label.text = viewModel.localizedDescription
    label.numberOfLines = 0
    label.textAlignment = .center
    button.setTitleColor(.black, for: .normal)
    button.setTitle("Retry", for: .normal)
    button.addTarget(self, action: #selector(handleTap), for: .touchUpInside)
  }

  @objc func handleTap() {
    assert(eventHandler != nil)
    eventHandler?.handle(event: AppViewEvent.retry, sender: self)
  }
}
Event Handling
With all that in place we can use the rootViewController to hold the AsyncView and listen to any events and perform appropriate actions. Assume AppController is the real brain of the app and provides the data when requested to the UI.
class ViewController: UIViewController, ViewEventHandler {
  private let controller = AppController()
  private lazy var contentVw = AsyncView(viewModel: .loading, eventHandler: self)

  override func viewDidLoad() {
    super.viewDidLoad()
    VFL(view)
      .add(subview: contentVw, name: "contentVw")
      .applyConstraints(formats: [
        "H:|[contentVw]|", "V:|[contentVw]|"
      ])

    Task.detached { await self.reloadPhotos() }
  }

  @MainActor
  private func reloadPhotos() async {
    contentVw.viewModel = .loading
    let photos = await controller.fetchPhotos()
    switch photos {
    case .success(let photos):
      let photoListVw = PhotoListView(
        viewModel: PhotoListViewModel(title: "Photos", photos: photos),
        eventHandler: self,
        controller: controller
      )
      contentVw.viewModel = .success(photoListVw)
    case .failure(let err):
      contentVw.viewModel = .error(err)
    }
  }

  func handle(event: ViewEvent, sender: UIView?) {
    guard let event = event as? AppViewEvent else {
      assertionFailure("Unrecognized event \(event)")
      return
    }

    switch event {
    case .retry:
      Task.detached { await self.reloadPhotos() }
    case .showDetails(let photo):
      let photoVwCtrl = PhotoViewController(photo: photo, controller: controller)
      present(photoVwCtrl, animated: true)
    }
  }
}
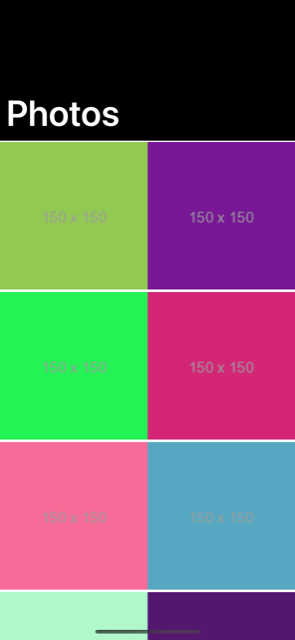
The PhotoListView is the view that provides a tiles of all the photos.
struct PhotoListViewModel {
  var title: String
  var photos: [Photo]
}

class PhotoListView: View<PhotoListViewModel> {
  private static let cellId = "photo-list-cell"
  private static let headerId = "photo-list-header"

  private let controller: AppController

  init(
    viewModel: PhotoListViewModel,
    eventHandler: ViewEventHandler?,
    frame: CGRect? = nil,
    controller: AppController
  ) {
    self.controller = controller
    super.init(viewModel: viewModel, eventHandler: eventHandler, frame: frame)
  }

  required init?(coder: NSCoder) {
    fatalError("init(coder:) has not been implemented")
  }

  private let collectionVw = UICollectionView(
    frame: .zero,
    collectionViewLayout: UICollectionViewFlowLayout()
  )

  override func setUp() {
    super.setUp()

    VFL(self)
      .add(subview: collectionVw, name: "collectionVw")
      .applyConstraints(formats: [
        "H:|[collectionVw]|", "V:|[collectionVw]|"
      ])

    collectionVw.register(CollectionCell.self, forCellWithReuseIdentifier: Self.cellId)
    collectionVw.register(
      CollectionReusableView.self,
      forSupplementaryViewOfKind: UICollectionView.elementKindSectionHeader,
      withReuseIdentifier: Self.headerId
    )

    backgroundColor = .black
    collectionVw.backgroundColor = .black
    collectionVw.dataSource = self
    collectionVw.delegate = self
  }

  override func viewModelDidUpdate() {
    super.viewModelDidUpdate()
    collectionVw.reloadData()
  }
}

extension PhotoListView: UICollectionViewDataSource {
  func collectionView(_ collectionView: UICollectionView, numberOfItemsInSection section: Int) -> Int {
    return viewModel.photos.count
  }

  func collectionView(_ collectionView: UICollectionView, cellForItemAt indexPath: IndexPath) -> UICollectionViewCell {
    let cell = collectionView.dequeueReusableCell(withReuseIdentifier: Self.cellId, for: indexPath)
    if let collectionCell = cell as? CollectionCell {
      collectionCell.view = PhotoView(
        viewModel: viewModel.photos[indexPath.item].thumbnailUrl,
        eventHandler: eventHandler,
        controller: controller
      )
    }
    return cell
  }

  func collectionView(_ collectionView: UICollectionView, viewForSupplementaryElementOfKind kind: String, at indexPath: IndexPath) -> UICollectionReusableView {
      let supplementaryView = collectionView.dequeueReusableSupplementaryView(ofKind: kind, withReuseIdentifier: Self.headerId, for: indexPath)
      if let headerView = supplementaryView as? CollectionReusableView {
        headerView.view = TitleView(viewModel.title)
      }
      return supplementaryView
    }
}

// MARK: UICollectionViewDelegateFlowLayout
extension PhotoListView: UICollectionViewDelegateFlowLayout {

    func collectionView(_ collectionView: UICollectionView, layout collectionViewLayout: UICollectionViewLayout, sizeForItemAt indexPath: IndexPath) -> CGSize {
      return CGSize(width: collectionView.bounds.width/2.0, height: 200
      )
    }

    func collectionView(_ collectionView: UICollectionView, layout collectionViewLayout: UICollectionViewLayout, insetForSectionAt section: Int) -> UIEdgeInsets {
        return .zero
    }

    func collectionView(_ collectionView: UICollectionView, layout collectionViewLayout: UICollectionViewLayout, minimumLineSpacingForSectionAt section: Int) -> CGFloat {
        return 0
    }

    func collectionView(_ collectionView: UICollectionView, layout collectionViewLayout: UICollectionViewLayout, minimumInteritemSpacingForSectionAt section: Int) -> CGFloat {
        return 0
    }

    func collectionView(_ collectionView: UICollectionView, layout collectionViewLayout: UICollectionViewLayout, referenceSizeForHeaderInSection section: Int) -> CGSize {
        return CGSize(width: collectionView.bounds.width, height: 128)
    }

    func collectionView(_ collectionView: UICollectionView, layout collectionViewLayout: UICollectionViewLayout, referenceSizeForFooterInSection section: Int) -> CGSize {
        return .zero
    }
}

extension PhotoListView: UICollectionViewDelegate {
    func collectionView(_ collectionView: UICollectionView, didSelectItemAt indexPath: IndexPath) {
      assert(eventHandler != nil)
      eventHandler?.handle(event: AppViewEvent.showDetails(viewModel.photos[indexPath.item]), sender: self)
    }
}

extension PhotoListView {
  class TitleView: View<String> {
    override func setUp() {
      super.setUp()
      let titleLabel = UILabel()
      VFL(self)
        .add(subview: titleLabel, name: "titleLabel")
        .applyConstraints(formats: ["V:[titleLabel]-|", "H:|-[titleLabel]|"])

      titleLabel.backgroundColor = .black
      titleLabel.font = UIFont.boldSystemFont(ofSize: 48)
      titleLabel.textColor = .white
      titleLabel.text = viewModel
    }
  }
}
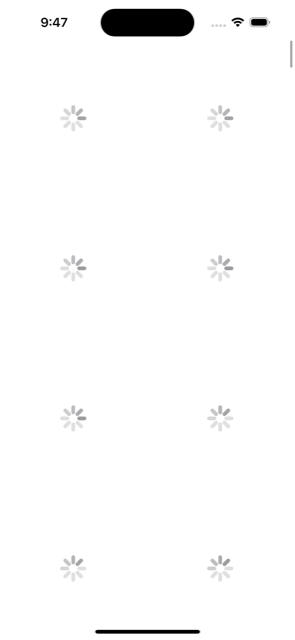
The most interesting view would be the PhotoView because it just gets a URL string and needs to asynchronously load that photo. So it can again go into 3 states: loading, error and success. But also it needs to be an EventHandler just to the retry loading the photo that failed to load otherwise forward the event up the tree.
typealias PhotoViewModel = String

class PhotoView: View<PhotoViewModel>, ViewEventHandler {
  private let controller: AppController
  private lazy var contentVw = AsyncView(viewModel: .loading, eventHandler: self)

  init(
    viewModel: PhotoViewModel,
    eventHandler: ViewEventHandler?,
    frame: CGRect? = nil,
    controller: AppController
  ) {
    self.controller = controller
    super.init(viewModel: viewModel, eventHandler: eventHandler, frame: frame)
  }

  required init?(coder: NSCoder) {
    fatalError("init(coder:) has not been implemented")
  }

  override func setUp() {
    super.setUp()
    VFL(self)
      .add(subview: contentVw, name: "contentVw")
      .applyConstraints(formats: ["V:|[contentVw]|", "H:|[contentVw]|"])

    Task.detached { await self.reloadPhoto() }
  }

  @MainActor
  private func reloadPhoto() async {
    contentVw.viewModel = .loading
    let photo = await controller.fetchImage(forURL: viewModel)
    switch photo {
    case .success(let image):
      let imageVw = UIImageView(image: image)
      imageVw.contentMode = .scaleAspectFit
      contentVw.viewModel = .success(imageVw)
    case .failure(let err):
      contentVw.viewModel = .error(err)
    }
  }

  func handle(event: ViewEvent, sender: UIView?) {
    guard let event = event as? AppViewEvent else {
      eventHandler?.handle(event: event, sender: sender)
      return
    }

    switch event {
    case .retry:
      Task.detached { await self.reloadPhoto() }
    default:
      eventHandler?.handle(event: event, sender: sender)
    }
  }
}
And that’s it! That is how it works!
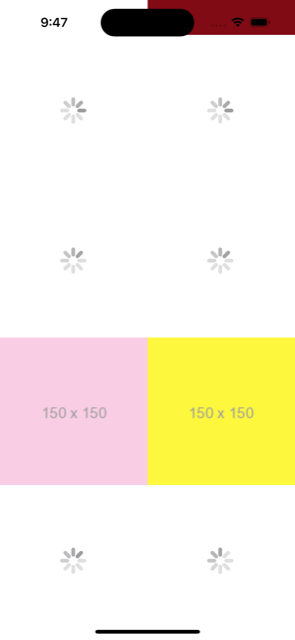
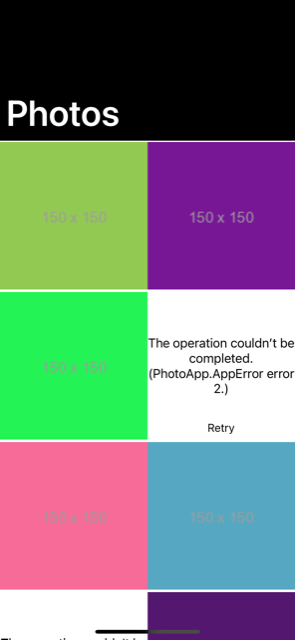
If you made it so far down my experiment, here are some screenshots from this experiment with various stages:

And yes, the code is also available for your personal experimentation: https://github.com/chunkyguy/WLKit.
Until next time!