Hello React Native one more time
I wanted to try React Native for quite some time now. But this time for real.

For context, I have tried building the https://github.com/chunkyguy/PhotoApp with React Native quite a while ago and it was fun but also scary because I had no clue what was happening. I was simply following some tutorial and copy pasting code from the internet to make things work. And yes, eventually I was able to fetch data and draw it on the screen but honestly I had no clue what just happened. The entire app was just this one file called App.js
import React, { Component } from 'react';
import { Text, View, FlatList, ActivityIndicator, Image } from 'react-native';

class ImageTile extends Component {
  render() {
    return <View>
      <Image source={{ uri: this.props.source }} style={{ width: 150, height: 150 }} />
      <Text>{this.props.title}</Text>
    </View>
  }
}

export default class PhotoApp extends Component {
  constructor(props) {
    super(props)
    this.state = { isLoading: true, title: 'Loading ...' };
  }

  componentDidMount() {
    return fetch('https://jsonplaceholder.typicode.com/photos')
      .then((response) => response.json())
      .then((responseJson) => {
        this.setState({
          isLoading: false,
          title: 'Photo App',
          dataSource: responseJson,
        }, function () {

        });
      })
      .catch((error) => {
        console.error(error);
      });
  }

  render() {
    if (this.state.isLoading) {
      return (
        <View style={{ flex: 1, padding: 20 }}>
          <ActivityIndicator />
        </View>
      );
    }

    return (
      <View style={{ padding: 100 }}>
        <Text style={{ fontSize: 32 }}>{this.state.title}</Text>
        <FlatList
          data={this.state.dataSource}
          renderItem={({ item }) => <ImageTile
            source={item.thumbnailUrl}
            title={item.title}
          />}
          keyExtractor={({ id }, index) => id}
        />
      </View>
    );
  }
}
So I decided to learn React Native for real. It took me almost a year. This is what happened:
- Started learning React Native
- Started learning javascript
- Gave up learning javascript as it was too confusing for my brain and started learning typescript instead
- typescript is awesome. Grasped enough to continue with my React Native journey
- Still can’t figure out React Native as it assumes a lot of prior knowledge of React
- Started learning React
- Can’t learn React without learning html and css. So started learning html css
- To make html css work with typescript I needed to understand how the build system work. So went deeper into web tech stuff like webpack, vite, babel, …
- Finally can build static web pages with html, css and typescript
- Took a brief detour to also learn express and mongoDB because most of React courses are MERN stack: mongoDB, express, react, node.js
- More deep diving into CommonJS vs ES modules, aka
const foo = require('foo')vsimport foo from 'foo' - Finally can build full stack web app with MERN stack. Am I a full stack developer now?
- Tried taking another stab at javascript because typescript assumes that you’re so good at javascript that you don’t even like it anymore
- javascript makes total sense now. Maybe I like it even more than typescript. Wut?!?
- Finally can now understand React Native
- Today made the
PhotoAppwith React Native in just a few hours
Not bad right?
So from what I know today, this is how I made the PhotoApp using React Native.
Installing React Native
At this step you’d probably looking at the Setting up the development environment page. The first question on expo vs react-native CLI is actually pretty simple to answer. I’ve no clue what is expo and right now I’ve no intention of learning so I’ll use the react-native CLI thank you. This means install node and watchman
brew install node
brew install watchman
node provides the environment for javascript to execute outside of browser and watchman is a tool that listens to changes you make to re-triggers a build if necessary.
Create app
Next step is to create the app. This mean running this command:
npx react-native@latest init PhotoApp
So you might have heard of npm, the node package manager used for installing packages but what the heck is npx? No that isn’t a typo, npx is a tool that lets you download a package and run the command within the package. So this command would download the latest stable version of react-native and then run the init command on it with PhotoApp as the argument. This would then run a bunch of other stuff to eventually create a minimal react-native app for you.
The installer might ask to run pod install at the almost end of the set up.
Do you want to install CocoaPods now? Only needed if you run your project in Xcode directly › (y/N)
I would suggest to say N, because it never seemed to the right thing for me. But if you feel comfortable try with y.
When the npx is done creating the project, you should have a PhotoApp directory with following contents:
.
├── App.tsx
├── Gemfile
├── README.md
├── __tests__
├── android
├── app.json
├── babel.config.js
├── index.js
├── ios
├── jest.config.js
├── metro.config.js
├── node_modules
├── package-lock.json
├── package.json
└── tsconfig.json
If you said N for the pod install step above, now is the time to run it manually:
cd ios
bundle install
bundle exec pod install
cd ..
This would finally make the app ready to go.
First run
Running the app requires 2 steps.
npm start
npm run ios
To understand what this does take a look at package.json and you would see a scripts section like this:
"scripts": {
  "android": "react-native run-android",
  "ios": "react-native run-ios",
  "lint": "eslint .",
  "start": "react-native start",
  "test": "jest"
}
npm start is the shorthand for npm run start which runs react-native start which starts the Metro server.
npm run ios runs react-native run-ios which compiles and builds the ‘client’ app on the simulator.
When developing React apps it is a common strategy to run a dev server on localhost and a bundler tool that listens for any changes to the source code. So whenever you save a js or ts file the bundler tool does a few things like converting typescript code to javascript or converting javascript code to more awesome javascript code or move static resources to some build directory and then restart the dev server from that build directory. And finally update the client app or the browser. This save you from having to manually restart the server and refresh the browser for every change. Or in our case we would have to not build and run the app for every change.
If all goes fine, you should be looking at this screen:
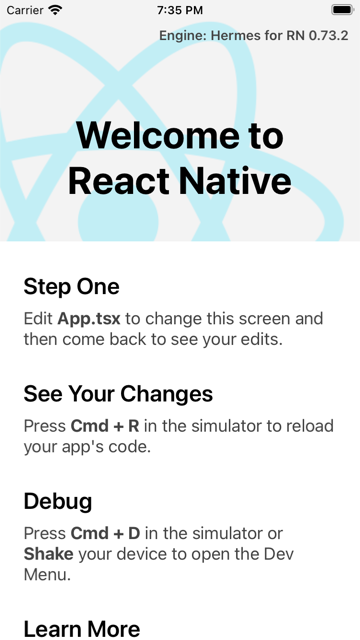
App setup
Although the default template now generates typescript code because that is what most of the experienced developers actually use. But if you’re just getting started typescript might not be a good idea. Typescript adds type annotations to all of your code that helps with catching bugs at build time but most the older tutorials and sample codes out there might still be in javascript. Also, most of the typescript developers assume that you know at least some basic javascript and also since at runtime the code that is being run is actually going to be javascript. So I think it is a good idea to start with javascript and later switch to typescript when you feel confident with the code.
If you’re convinced to continue with javascript then rename the App.tsx to App.jsx, otherwise continue with typescript. All of the javascript code should also run with typescript.
Next, replace the App.jsx with following:
import React from 'react';
import {Text, View} from 'react-native';

export default function App() {
  return (
    <View>
      <Text>Hello React Native!</Text>
    </View>
  );
}
And you should have a minimal app running with the ‘Hello React Native’ text at top left behind the status bar.

Building UI
The way I like to structure the app is by splitting the views in screens and components. Think of screen as the full screen content and components as reusable fragments. Then each screen can be designed in isolation and components can be placed in a common components directory.
So, for our app has 2 screens:
HomeScreen: The 2 column list of photosDetailsScreen: Single photo details
And 2 components:
PhotoTile: Single photo viewPhotoList: Grid view with 2 column list ofPhotoTile
I also like to build the app UI inside out. What that means is to start with the individual components and then compose the screen from those components. In my head I like to think in terms of the UI tree and then starting with the leaf nodes first and later going upwards. This makes it clear with what data needs to be injected from the parent node and what events need to be propagated upwards - aka the FLIC model.
Now lets take a look the data that we are going to get from our API. It looks like an array of elements with each element describing a photo.
[
  {
    "albumId": 1,
    "id": 1,
    "title": "accusamus beatae ad facilis cum similique qui sunt",
    "url": "https://via.placeholder.com/600/92c952",
    "thumbnailUrl": "https://via.placeholder.com/150/92c952"
  },
  ...
]
Starting with PhotoTile, it takes in an element from the array and renders it within half of the screen width
/*
const photo = {
  albumId: 1,
  id: 1,
  title: 'accusamus beatae ad facilis cum similique qui sunt',
  url: 'https://via.placeholder.com/600/92c952',
  thumbnailUrl: 'https://via.placeholder.com/150/92c952',
};

<PhotoTile photo={photo} />
*/

export default function PhotoTile({photo}) {
  const {title, thumbnailUrl} = photo;

  return (
    <View style={styles.container}>
      <TouchableOpacity style={styles.content}>
        <Image style={styles.image} source={{uri: thumbnailUrl}} />
        <Text style={styles.title} numberOfLines={2}>
          {title}
        </Text>
      </TouchableOpacity>
    </View>
  );
}

const styles = StyleSheet.create({
  container: {
    width: Dimensions.get('window').width / 2,
    height: 220,
  },
  content: {
    backgroundColor: '#f2f2f2',
    alignItems: 'center',
    margin: 8,
  },
  image: {
    width: 150,
    height: 150,
  },
  title: {
    fontSize: 18,
    textAlign: 'center',
    paddingTop: 8,
  },
});
Next up, PhotoList takes in a list of photos and draws a grid of PhotoTile
/*
const photoList = [
  {
    albumId: 1,
    id: 1,
    title: 'accusamus beatae ad facilis cum similique qui sunt',
    url: 'https://via.placeholder.com/600/92c952',
    thumbnailUrl: 'https://via.placeholder.com/150/92c952',
  },
  ...
]

<PhotoList photoList={photoList} />
*/

export default function PhotoList({photoList}) {
  return (
    <FlatList
      data={photoList}
      renderItem={itemInfo => {
        const {item} = itemInfo;
        return <PhotoTile photo={item} />;
      }}
      keyExtractor={item => {
        const {id} = item;
        return id;
      }}
      horizontal={false}
      numColumns={2}
    />
  );
}
And then finally at the root level the HomeScreen builds the full screen UI using PhotoList within the available safe area
const photoList = [
  {
    albumId: 1,
    id: 1,
    title: 'accusamus beatae ad facilis cum similique qui sunt',
    url: 'https://via.placeholder.com/600/92c952',
    thumbnailUrl: 'https://via.placeholder.com/150/92c952',
  },
  {
    albumId: 1,
    id: 2,
    title: 'reprehenderit est deserunt velit ipsam',
    url: 'https://via.placeholder.com/600/771796',
    thumbnailUrl: 'https://via.placeholder.com/150/771796',
  },
  {
    albumId: 1,
    id: 3,
    title: 'officia porro iure quia iusto qui ipsa ut modi',
    url: 'https://via.placeholder.com/600/24f355',
    thumbnailUrl: 'https://via.placeholder.com/150/24f355',
  },
];

export default function HomeScreen() {
  return (
    <SafeAreaView style={styles.container}>
      <PhotoList photoList={photoList} />
    </SafeAreaView>
  );
}

const styles = StyleSheet.create({
  container: {
    flex: 1,
  },
});
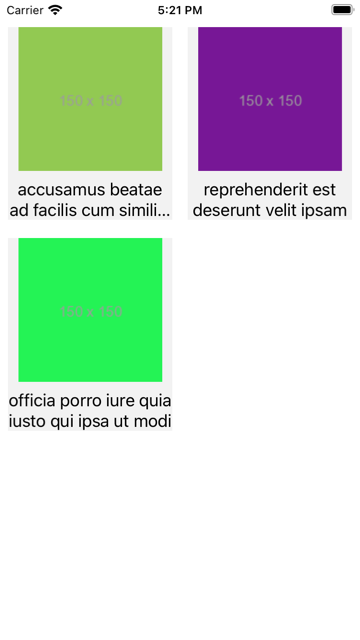
Notice, we are not actually making any real network calls but just using some fake data to build the UI. Also while designing we can make use of hot reloading by setting the App to draw the HomeScreen
export default function App() {
  return <HomeScreen />;
}
With this, our HomeScreen should look like
Next, similarly we can design the DetailsScreen
const photo = {
  albumId: 1,
  id: 1,
  title: 'accusamus beatae ad facilis cum similique qui sunt',
  url: 'https://via.placeholder.com/600/92c952',
  thumbnailUrl: 'https://via.placeholder.com/150/92c952',
};

export default function DetailsScreen() {
  const {title, url} = photo;
  return (
    <SafeAreaView style={styles.container}>
      <Image style={styles.image} source={{uri: url}} />
      <Text style={styles.title}>{title}</Text>
    </SafeAreaView>
  );
}

const styles = StyleSheet.create({
  container: {
    flex: 1,
    alignItems: 'center',
    justifyContent: 'center',
    padding: 8,
  },
  image: {
    width: 300,
    height: 300,
  },
  title: {
    fontSize: 18,
    textAlign: 'center',
    paddingTop: 8,
  },
});
That we can validate by updating the App to only draw the DetailsScreen
export default function App() {
  return <DetailsScreen />;
}

Navigation
So now that we have 2 screens working in isolation. It’s time to add navigation. To have the native navigation we can use the @react-navigation package by installing these packages:
npm install @react-navigation/native
npm install @react-navigation/native-stack
npm install react-native-screens
npm install react-native-safe-area-context
Some packages are actually wrappers around pods so it is a good idea to run pod install to update the internal Xcode project. I just use this one liner cd ios && bundle exec pod install && cd ... And if the npm package turns out to be indeed a wrapper around a pod then you might also have to run npm run ios to build the iOS app again.
So, to set up navigation we need to wrap the entire app within a NavigationContainer and then have a Navigator component with multiple named routes with each route having a 1:1 mapping to a screen component.
In code it looks like:
const Stack = createNativeStackNavigator();

export default function App() {
  return (
    <NavigationContainer>
      <Stack.Navigator>
        <Stack.Screen
          name="Home"
          component={HomeScreen}
          options={{title: 'Photo App'}}
        />
        <Stack.Screen
          name="Details"
          component={DetailsScreen}
          options={{title: 'Details'}}
        />
      </Stack.Navigator>
    </NavigationContainer>
  );
}
And then to actually go from the HomeScreen to the DetailsScreen we need to handle the tap gesture in the PhotoTile
export default function PhotoTile({photo, navigation}) {
  // ...

  const handleTap = () => {
    navigation.navigate('Details');
  };

  return (
    <View style={styles.container}>
      <TouchableOpacity style={styles.content} onPress={handleTap}>
        // ...
      </TouchableOpacity>
    </View>
  );
}
Also update the PhotoList and the HomeScreen to pass the navigation downwards
// PhotoList.jsx
export default function PhotoList({photoList, navigation}) {
  return (
    // ...
        <PhotoTile photo={item} navigation={navigation} />;
    // ...
  );
}

// HomeScreen.jsx
export default function HomeScreen({navigation}) {
  return (
    <SafeAreaView style={styles.container}>
      <PhotoList photoList={photoList} navigation={navigation} />
    </SafeAreaView>
  );
}
With this the app should have a working navigation
Passing data between screens
We want the photo data to be passed from the HomeScreen to the DetailsScreen. To achieve this we need to first pass the photo from the PhotoTile as part of event and then use that data to construct the DetailsScreen.
With react native this part is a piece of cake:
// PhotoTile.jsx

// ...
  const handleTap = () => {
    navigation.navigate('Details', { photo });
  };
// ...


// Details.jsx
export default function DetailsScreen({photo, navigation}) {
  // ...
}
The real glue is in the App.jsx where we need to update the routing from drawing static screen to a function that returns a dynamic screen
// App.jsx
export default function App() {
  return (
    <NavigationContainer>
      <Stack.Navigator>
        <Stack.Screen
          name="Home"
          component={HomeScreen}
          options={{title: 'Photo App'}}
        />
        <Stack.Screen name="Details">
          {props => {
            const {photo} = props.route.params;
            return <DetailsScreen photo={photo} />;
          }}
        </Stack.Screen>
      </Stack.Navigator>
    </NavigationContainer>
  );
}

Fetching data from the network
As a final piece we need to fetch the real data from the API. The javascript provides a fetch API for this. And then we need to use 2 hooks from react to consume that data.
useEffect: To start fetching datauseState: To store the state of the data
useEffect takes 2 arguments, a list of values that we need to observe for any changes and a function that is called when the changes are observed. For our case we just need to call fetch at first launch so we pass in an empty array. But if were to provide a refresh button of some sort this is where we would provide that.
useState is just a box to persist the data across different redraw of the component and also a function to trigger a redraw when value changes. Like for our when the fetch finishes.
// Home.jsx
export default function HomeScreen({navigation}) {
  const [isLoading, setLoading] = useState(true);
  const [photoList, setPhotoList] = useState([]);

  const fetchPhotos = async () => {
    try {
      setLoading(true);
      const res = await fetch('https://jsonplaceholder.typicode.com/photos');
      setPhotoList(await res.json());
    } catch (error) {
      console.error(error);
    } finally {
      setLoading(false);
    }
  };

  useEffect(() => {
    fetchPhotos();
  }, []);

  return (
    <SafeAreaView style={styles.container}>
      {isLoading ? (
        <ActivityIndicator />
      ) : (
        <PhotoList photoList={photoList} navigation={navigation} />
      )}
    </SafeAreaView>
  );
}
And with this change our app should be finally complete
Conclusion
So after spending more than a year learning all the web tech things and rebuilding the React Native app how do I feel?
I think the React framework for building web apps is pretty awesome because it builds on top of existing knowledge of html, css, javascript and whatever was out there already. But for React Native it seems like in order to bring React to the mobile they had to invent a sort of mini browser that lives inside your app and yet with all the mind blowing engineering that went in to make React Native work, with the current state of things it is still disappointing to both web devs moving to mobile and mobile devs moving to web.
The only devs who might really enjoy React Native are ones who have been tasked to build both the web frontend and the mobile apps.
But said that, I’ve heard there’s a new rendering engine being developed, let’s see how that changes the picture.
The code from this article is available at https://github.com/chunkyguy/PhotoApp
References
- https://reactnative.dev/docs/environment-setup
- https://reactnative.dev/blog/2016/03/24/introducing-hot-reloading
- https://webpack.js.org/guides/hot-module-replacement/
- https://reactnative.dev/docs/navigation
- https://developer.mozilla.org/en-US/docs/Web/API/Fetch_API/Using_Fetch
- https://react.dev/reference/react/useEffect
- https://react.dev/reference/react/useState